Kids Back to School Crafts

Back to school is such a magical time for kids. New notebooks and pencils are on the shopping lists, and kids can't wait to meet their new teachers. Help keep the excitement going all school year long with these fun crafts to personalize their supplies.

Backpacks
A child's backpack is the one item that they will (hopefully) be using all school year long (and not lose on the school bus). Also, the backpack is often a status symbol. Let your child show his individuality and make it his own. You can also save money by buying inexpensive plain backpacks rather than the one promoting the latest movie or cartoon show. Instead, use fabric paint to write the child's name, draw symbols or emoticons, or add hand prints. Girls may also enjoy a touch of sparkle with glitter, beads, and stick-on gems. Stickers are easily applied and removed when they get dirty or are no longer in style. And it is always a lot easier than having to buy another backpack because a child no longer likes the movie or television show because it is no longer cool or he has outgrown it.
Pony bead key chain/backpack decorations
Pony beads are quite possibly the most versatile little pieces of plastic out there. They can be used to form rainbows, animals, sayings, and any other colorful item to hang from key chains and backpacks. Patterns abound on the internet, and beads are available at any craft store or click here to see on Amazon.

Book covers
Home made book covers are a great way to personalize your child's school experience, and they are protective. Children can express their creativity by drawing pictures of school supplies, favorite cartoons, band logos, or their friends, family, and pets. This project will use markers or crayons, pencils, stickers, scissors, tape, and a brown paper grocery bag.
Cut the bag down a corner and cut off the bottom. Lay the textbook on the flattened brown paper. The paper should make a giant rectangle. Open the book so that the spine is against the paper bag. Fold the top and bottom of the rectangle to meet the edges of the book, making a crease on each side. Remove the book, and fold the paper at the creases. Lay the book back on the paper, and line it up with the top and bottom edges. Shut the book. It is important to do this next step while the book is shut so that while the cover is on, things will line up properly and the book will shut. Fold the paper from the right and tuck it behind the back page of the book. Wrap the paper around the spine of the book and fold the other side under the front cover. You can now either tape the corners to hold the cover in place or simply tuck the sides of the front and back covers into the pockets formed by the folds at the sides of the book cover.
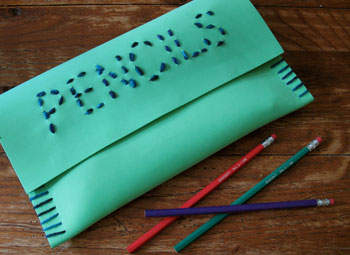
Pencil pouches
Throughout the school year, pencils need a home, too. Pencil pouches and boxes make a great afternoon project and reduce pencil homelessness by ten-fold. Sewing pencil pouches should be reserved for slightly older children who have patience and will not poke themselves with the needle. Pencil boxes can easily be decorated with yarn or ribbons and a little bit of glue or markers and crayons.
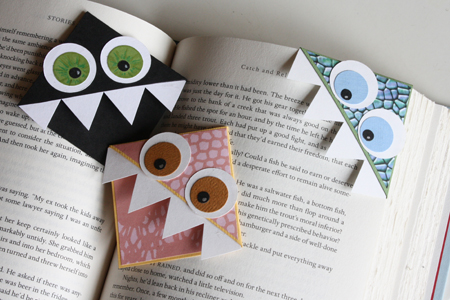
Bookmarks
The right bookmarks will repeatedly bring a child back to a book. Wallpaper and paint samples add great colors and textures. Traditional flat strip bookmarks are easier for small children, but make sure to use a heavier card stock so that the bookmarks will be more durable. A fun option for slightly older students is the corner-covering bookmarks. These bookmarks can look like monsters eating the page, animals, or can just contain doodles like rainbows and unicorns.
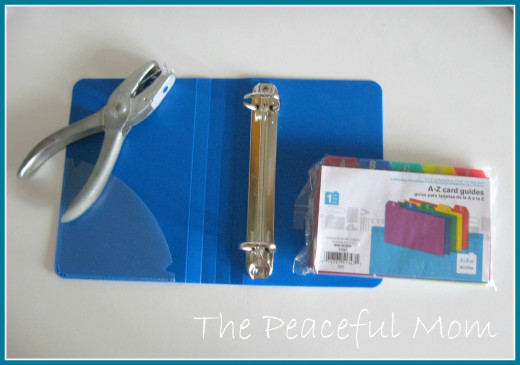
Binder cover inserts
Three ring binders are great to keep children organized but can be kind of bland. Most binders have a clear plastic pocket for covers to be inserted. Visit your local scrapbook store or use items around the house to make a one of a kind binder cover. Ribbons, foam letters, stickers, glitter glue, and confetti: anything goes when it comes to binder covers.
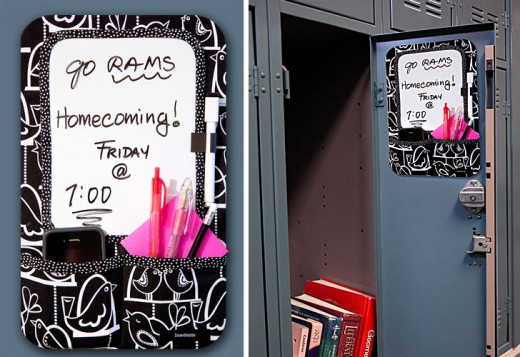
Locker bulletin board
Junior high and high school students use locker bulletin boards and marker boards to track homework, post pictures of friends and idols, and count down to the end of the school year. Build a border around the bulletin board using ribbons, glitter, duct tape, or words from magazines or newspapers to form song lyrics or poetry.
If you are handy with a sewing machine, you can even add pockets, as seen with my picture.

Magnets
Teens and tweens the world over enjoy hanging mini-posters, pictures, and reminders on their locker doors. Save the scotch tape, and brighten up your child's locker with fun magnets
One current trend that has also found it's way into jewelry is pop bottle caps. Simply fill the inside of the bottle caps with different colors of glitter glue. Smooth out the glue. Add embellishments like beads, and let it dry. Add a magnet to the backside of the bottle top, and voila!
Small clothes pins also work great for holding papers. Add mini googly eyes to create animals, write motivational sayings or song lyrics, or paint them with funky colors.
Hair accessories
Most little girls like dressing up once in a while. Hair accessories can be some of the simplest crafts to do with a girl. A project can be as small as threading three colored pony beads onto a bobby pin or as complex as a bead mosaic barrette. Peacock and fluffy marabou feathers add great accents to any clip or claw, and leftover scraps of material can be trimmed or folded into awesome flowers.
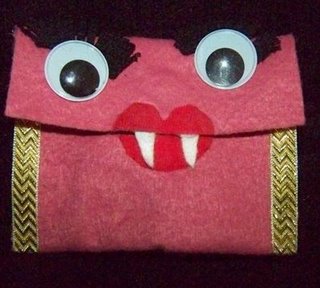
Lunch money coin purses
Coin purses aren't just for little girls. You can add some attitude and individuality by choosing elements that accentuate your child's personality. If you have a rough-and-tumble kid, use canvas, camouflage, or even duct tape. If your child is girly, use bright colors, patterns, and sparkles.


